Wednesday, May 21, 2014

Colorado

I recently had the opportunity to travel down to Colorado. Those few short days that I got to spend away from NYC, away from the noise and the rush, were one of the best things I've done for myself in awhile. Just being in a quieter and slower surrounding helped my body slow down and recharge, and all the new things I saw stirred my curiosity and fascination once again. Now I feel more enthusiastic about doing new things, and more inspired to keep things interesting at home. That's why I love to travel! 

Below are some pictures of my time in Colorado:

Green all around.


Blue also all around.

People watching at the famous Red Rock Amphitheater.


Feel like I'm in an old Italian painting.

Gagh, so beautiful I can't take it.

The drive to Boulder with the Rockies in the background.

The beautiful Shiba Inu that shared the back seat with me.

More snow cap mountains.


Wednesday, February 5, 2014

Oh my darling Clementine (Cake)!

Last week was Chinese New Year, and I decided to bring home a little something this year. I wanted to bring dessert, but the problem is my parents don't like anything too sweet. Asian parents I tell you. They are the only two people in the world that I know that do not like chocolate (BIZARRE, I know.) So I thought whatever I make, it has to be something flavorful but not too sweet. That's when I remembered while watching Walter Mitty, one of the characters made a clementine cake.

Clementine cake! It's actually quite perfect for the occasion since clementines are considered to be good luck in Chinese culture. So I quickly googled a recipe (here) and turns out it only requires five ingredients! That's right, FIVE.
  • 6-7 small clementines (think golf-balls)
  • 6 eggs
  • 2 1/4 cup of almond meal (I heard you can also use almond flour if you can't find almond meal but I have not tried it)
  • 1/2 cup of sugar (half of what was called in the original recipe)
  • 1 tsp of baking powder

Be warned you DO need about 3.5 hours to make this. Two-thirds of that time though is just boiling the clementines (which you don't even have to be there for.) Just make sure you set a timer!

So let's get to work. How does one make a clementine cake?

1.  Rinse the clementines and place them in a pot of water (skin and all) and wait for it to boil. Once boiling, reduce to low heat and simmer for 2 hours.


2. When the clementines are almost done, mix together almond meal, sugar, eggs, and baking powder.


3. Once clementines are done, drain and rinse them gently in cool water.
Be careful, they are hot and delicate!

4. Once cooled, rip the clementines in half and remove any seeds. Place them in a bowl and mash with a fork or hand. You may also use a food processor but I found it quite easy to do with hands.


5. Finally, mix all the ingredients together into a cake pan (greased with butter for easy removal later).


6. Lastly, bake in oven at 375 deg. Fahrenheit or 190 deg. Celsius for 40 minutes, or until knife or toothpick comes out clean when inserted. Once that's the case, cover the cake with foil and bake for another 20 minutes. The foil will help prevent the cake from burning. The result should have a nice brown, golden color on top.


Soft, flavorful, and delicious!

Asian parents approved.


Wednesday, January 29, 2014

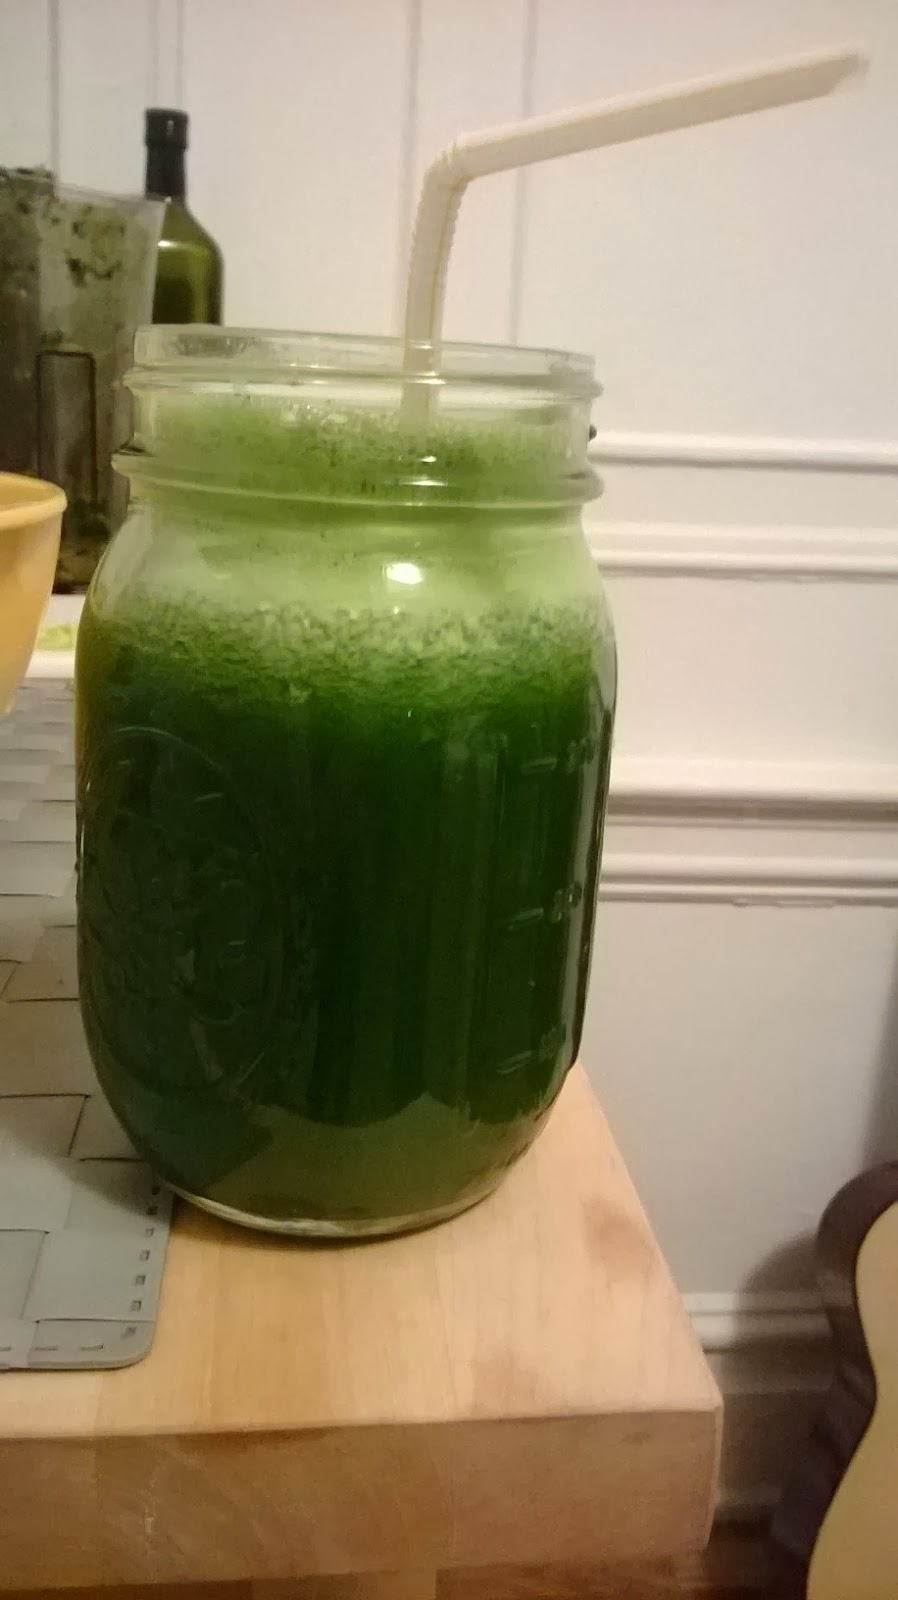
Hop on the green juice boat yo!


I know, I know, YOU too?? Yes, I've become one of them. A green juice fanatic.

Slicing and crushing things with my blender was fun, but THIS was a whole new level. I repeat, blending does not equal juicing, and the same goes for smoothies and juices. Two completely separate things. 


After I got my juicer, like the amateur that I was, I didn't know where to start. There were so many recipes online, one could literally search for days. After about an hour I finally gave up, hopped off my chair and just went to the supermarket. I used my instincts and just bought anything, literally anything that was green.

Then finally in the kitchen I asked myself:

What do I do with the seeds? Do I remove them?
Being the silly person that I am I actually did with my apples, then I realized how pointless that was because my juicer literally obliterated everything. Quite fun to watch.

Do I have to wash everything? 
This may be common sense but yes you should. Trust me, you do not want dirt from your organic spinach floating around and I imagine it is not so good for the blades in your juicer.

How long will the juice stay fresh in my fridge?
From what I heard, juice if kept in a sealed container will remain fresh for up to 3 days, but I usually down all mine within two. 

Is it hard to wash a juicer? 
Not hard, just annoying. I do appreciate that mine came with a cute little brush for scrubbing down.

Should I get a really expensive juicer? 
No, I do NOT recommend throwing hundreds on a juicer if it's your first time. How will you know if you'll even use it more than once? Mine is from Amazon for around 60 bucks. Here is the link.

After trying a couple of recipes, this was my favorite.


(Makes 2 servings)
1 whole apple
1/2 of a large cucumber
4 large stalks of Celery
A handful of spinach


The result?

Hulk juice.


Thursday, August 8, 2013

I've been absent...but I made zucchini pasta! (or noodles?)

I did it! I finally made zucchini pasta! I've heard so much about this raw pasta thing, but never had the energy to actually make it. And guess what? You don't even need a fancy shmancy tool to do it (although I kind of still want one.) Instead I used a cheese grater! That's right.

What you do is you simply wash your zucchinis, chop off the ends, and grate them just as you would like cheese. Tip: the further down you start on the grater, the longer the strands would be. Here's how mine came out:
When you get to the core and can't grate anymore, cut them up and toss it in with the rest!

To be honest, mine came out a little soggy once heated up for a few minutes. Will try it raw next time.

Monday, April 15, 2013

Sunday, March 24, 2013

Boring salad? Not mine!

As a young kid, I never liked salads. Especially since I grew up in a traditional Chinese household where all our vegetables were cooked, eating raw vegetable was a strange thing to me. I would walk right by them at buffets, and just poke at them when they came with my entrees. Then I discovered not all salads are born the same way.

I will never forget the time I went to Cape Cod and had the most amazing seafood salad. Wow! The flavors, the crunchiness, the tangyness of the oranges, the sweetness of the cranberries and the freshness of the shrimps! Everything in there was so good! Nothing in that bowl was untouched.

A good salad, a TRUE salad, for me has to contain a couple of ingredients. Dark leafy greens (no lettuce!), some type of protein, some kind of nuts, a sweet or sour component such as dried cranberries or fruits, and lastly cheese. Once this is all done, the dressing can be anything simple like a vinaigrette or oil.

Here's one of my favs including a dressing that only takes three simple ingredients to make:

Kale is an excellent for salads because they actually taste better after a few days!
Ingredients used (no measurements by the way, just put however much you like):
Kale
Carrots
Garlic
Red onion
Almond slices or flaxeed
Cranberries
Cheese (I like Parmesan)
Dash of salt and pepper to taste

For the dressing (enough for a bowl of salad):
1tbs of fresh lemon juice
1/8 cup of extra virgin olive oil
1/2 tbs of honey

Now, do you HAVE to have flax seed or cranberries? No! Put what you want! Throw in some chicken or shrimp. I didn't have cranberries, so I threw in grapes and it tasted great! As long as you've got the dressing and the vegetables, you are golden.



Thursday, January 10, 2013

I just took hip to another level- I made KIMCHI.

If someone had told me a few months ago to make kimchi, I would've said hell no. Have you seen the episode of Anthony Bourdain where those Korean ladies up in the mountains were bent over backwards making those hot balls of things?! But what do you know, here I was today making kimchi. 

After I heard of the health benefits of Kimchi, or any fermented food in general (read here), I quickly googled how to make kimchi. From what I gathered, there are many ways to make kimchi. One can put all sorts of ingredients in it as long as you've got the basics: napa cabbage, hot pepper flakes, fish sauce or soy sauce and salt. For the simplest recipe, I used Maangchi's 'Emergency Kimchi' recipe  here). Note, on the site the author calls "emergency" kimchi, meaning it's simple enough that it can be done in a situation of desperation. Well this was a kimchi desperation. 

If you are feeling more bold and audacious than me though, feel free to explore Maangchi's large inventory of kimchi recipes, this one just seemed the most do-able to me.

Ingredients used were:

2 lbs Napa cabbage (these things are heavy!)
1/3 cup Hot pepper flakes (This is NOT the same as chili pepper flakes!)
1/4 cup Fish sauce (Or soy sauce if you are vegetarian.)
1 Carrots
2-3 stalks of Scallions (green onions)
6 cloves of Garlic
1tbs Sugar
1/4 cup of Kosher Salt or 1/8 cup of regular table salt

Step 1. Wash and cut 2lbs of nappa cabbage into thin strips then drain. (*Tip: If you don't know how much cabbage you bought, check the supermarket receipt, they weigh it at checkout.)
It really helps to use a mesh bowl/salad bowl.
Step 2. Mix 1 cup of water and 1/4 cup of salt into cabbage, toss evenly with hand and set aside for 10 minutes. (You may use regular table salt, but note that you should probably put less since the grain size of kosher salt is much larger than table salt...I learned that the hard way.)
I'm using table salt here and notice I didn't fill the whole thing.
Meanwhile...

Step 3. Prepare kimchi paste by mixing:
-1/4 cup of julienned carrots (use a vegetable peeler to create thin strips for faster results)
-1/4 cup of diced garlic
-1/3 cup of chopped scallions
-1/3 cup hot pepper flakes
-1/4 cup of fish sauce
-1 tablespoon of sugar (or half tbsp of stevia).


Step 3.5. Check on cabbage, and rinse as much salt off cabbage as possible, repeat 2-3 times. Drain.

Step 4. Mix kimchi paste with cabbage, and mix it well. I strongly suggest using your hands!
The smell from this will REALLY make you drool.
Step 5. Put final mix into storage containers. Try to squish in as much as possible into each container. The tighter the space and lesser the air, the better the kimchi will ferment.


This is all 2lbs of kimchi, they really shrink!
Now you may eat some of the final product, which is delicious, but for true kimchi, you must leave it to sit in room temperature for a few days for it to truly ferment. After about 3 or 4 days, you should see air bubbles rising in the mixture. That is an indication that the kimchi is fermenting. I'm going to leave mine alone for about a week.

So there you have it. Even though it looks like a lot of steps, all there really is is a lot of chopping and dicing. You don't even need to turn on the stove. Treat the mixing like an arm workout. It's so delicious and worth it. 

END.